


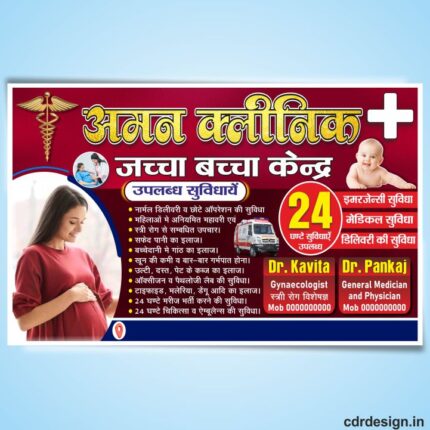
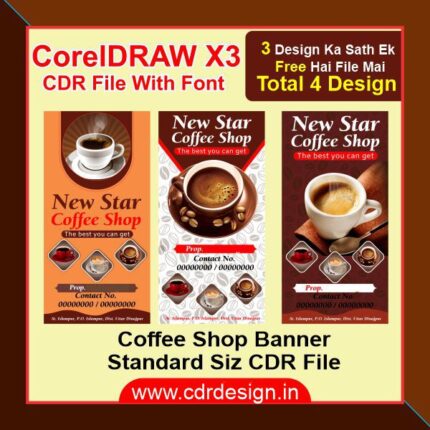
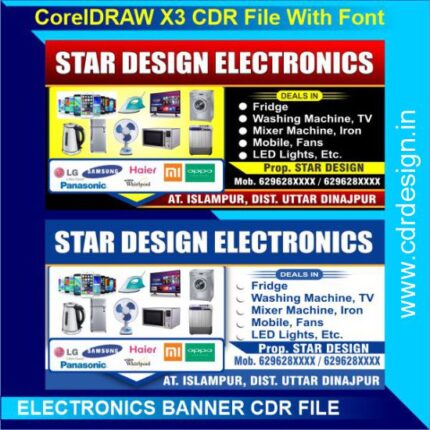
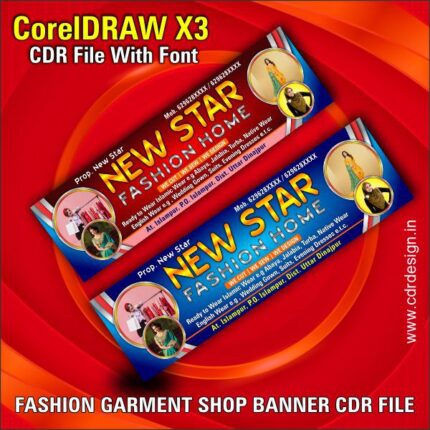
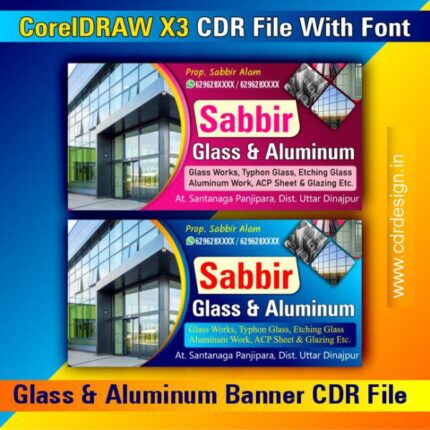
Photography Banner Design CDR File
₹10.00
Photography Banner Design cdr file
Corel Draw X3 File
With Necessary Fonts
The File is Editable in CorelDraw
- Note: this design is only for the designers not
- for customers. Customization start from Rs.100
- How to Download:
- https://www.youtube.com/
- Instant Download:
- Your files will be available
- to download once payment is confirmed.
- (instant download items don’t accept returns,
- exchanges, or refunds. Please check all details
- before buying.)
-
- Help Number: call or WhatsApp
- Call us: 6296285862 (9 AM to 6 PM)
- CdrDesign License: Use for personal and
- commercial purposes more info
- Copyright Disclaimer:
- This File is uploaded by
- the user. We do not claim any copyright for
- the content. ( If the contents violate your
- copyright, please email us,
- cdrdesign8@gmail.com
Designing Eye-Catching Photography Banners with CDR Files: A Comprehensive Guide
CorelDRAW (CDR) files offer a powerful platform for creating professional-looking photography banners. Whether you’re promoting a photography business, showcasing your portfolio, or advertising a photography event, a well-designed banner can significantly impact your reach and engagement. This article explores the key elements of designing effective photography banners using CDR and offers tips for maximizing their impact.
Thank you for reading this post, don't forget to subscribe!Understanding the Importance of Banner Design:
In today’s digital landscape, a visually appealing banner is crucial for grabbing attention. A poorly designed banner can be easily overlooked, while a strong design can draw the viewer in and communicate your message effectively. Photography banners, in particular, need to highlight the quality and artistry of the photographs they represent.
Leveraging CDR for Photography Banner Design:
CorelDRAW’s robust features make it an ideal choice for creating visually stunning photography banners. Its capabilities include:
- Vector Graphics: CDR uses vector graphics, meaning images are resolution-independent. This ensures your banner looks sharp and crisp regardless of size or printing method. This is crucial for banners that might be displayed at various sizes, online or offline.
- Image Editing Tools: CDR offers advanced image editing tools to enhance your photographs before incorporating them into the banner design. You can adjust brightness, contrast, saturation, and more, ensuring your images are optimized for display.
- Text and Typography: Choosing the right font and text size is vital for banner readability. CDR provides a wide selection of fonts, allowing you to select styles that complement your photography’s aesthetic.
- Layout and Composition: CDR allows for precise control over the layout and composition of your banner design. You can experiment with different arrangements of text, images, and other design elements to achieve the desired visual hierarchy.
- Color Management: Accurate color reproduction is crucial for photography banners. CDR’s color management tools help ensure your banner colors are consistent across different devices and printing methods.
Key Design Elements for Effective Photography Banners:
- High-Quality Images: Use only high-resolution images that are sharp and visually appealing. Blurry or poorly lit photographs will detract from the overall impact of your banner.
- Strategic Image Selection: Choose images that best represent your photography style and the message you want to convey. Consider the overall mood and feeling you want to evoke.
- Clean and Simple Layout: Avoid overcrowding the banner with too many elements. A clean and minimalist design will make your photography stand out.
- Compelling Headline: Use a concise and attention-grabbing headline that clearly communicates your message.
- Call to Action (CTA): Include a clear call to action, such as “Visit our website,” “Book a session,” or “View our portfolio.”
- Consistent Branding: Ensure the banner aligns with your overall brand identity in terms of colors, fonts, and logo.
Creating Your Photography Banner in CDR:
- Plan your design: Sketch out your ideas on paper before starting in CDR. This will save time and ensure a smoother design process.
- Import your images: Import your high-resolution photographs into CDR.
- Edit your images: Adjust the brightness, contrast, and saturation of your images as needed.
- Create your layout: Arrange your images and text elements according to your design plan.
- Add your CTA and branding elements: Include your call to action and brand elements like your logo and contact information.
- Export your banner: Once you are satisfied with your design, export your banner in the appropriate format (e.g., JPG, PNG) for your intended use.
Conclusion:
Designing effective photography banners using CDR files enables you to create professional and eye-catching marketing materials. By following these guidelines and utilizing CDR’s powerful features, you can create banners that effectively showcase your photography and achieve your marketing goals. Remember to always prioritize high-quality images, a clear message, and a visually appealing layout.


Reviews
There are no reviews yet.